Table of Contents
Background
Hello everyone in this article we are going to understand about GitHub copilot for beginner. We are creating this article for absolutely beginner.
What is GitHub Copilot
GitHub Copilot is another service from GitHub and OpenAI. It is an extension to Visual Studio Code which auto-generate code based on your current content, and your present cursor area.
How to install GitHub Copilot
GitHub Copilot is now only available for Visual Studio Code Let us see step by step process to setup
Step 1:- Download Visual Studio Code
Step 2:- Go to https://marketplace.visualstudio.com/items?itemName=GitHub.copilot
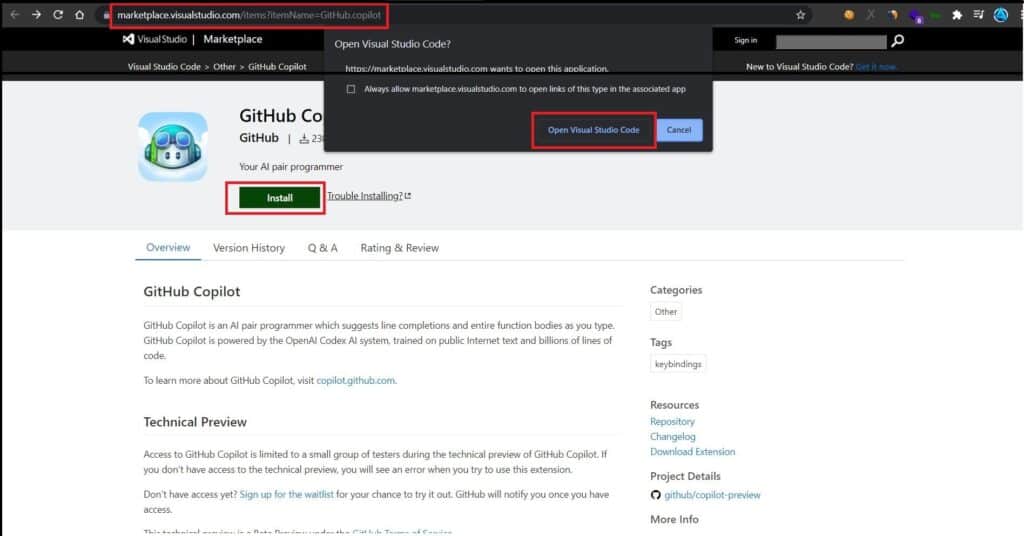
once you click above URL you will see this kind of screen click on install button and then click on open visual studio code.
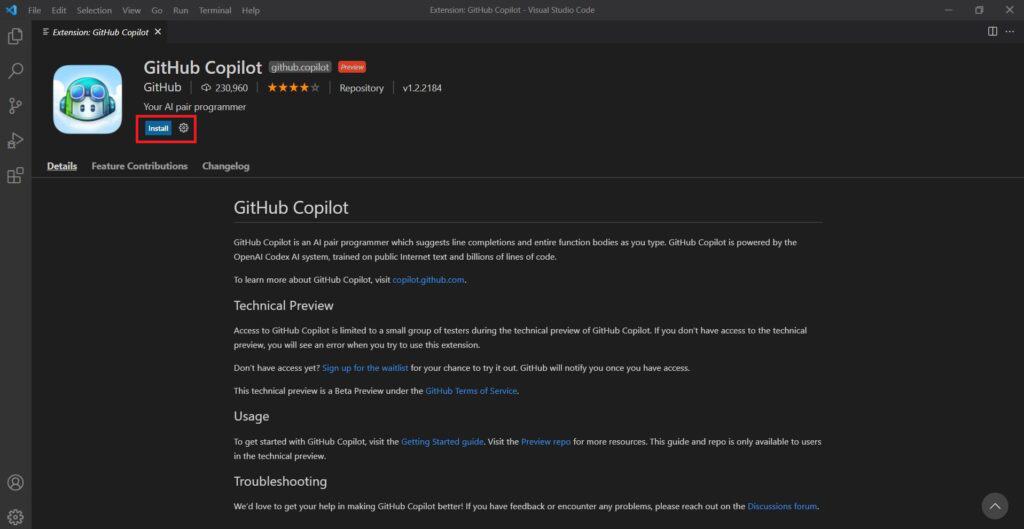
Click on install button
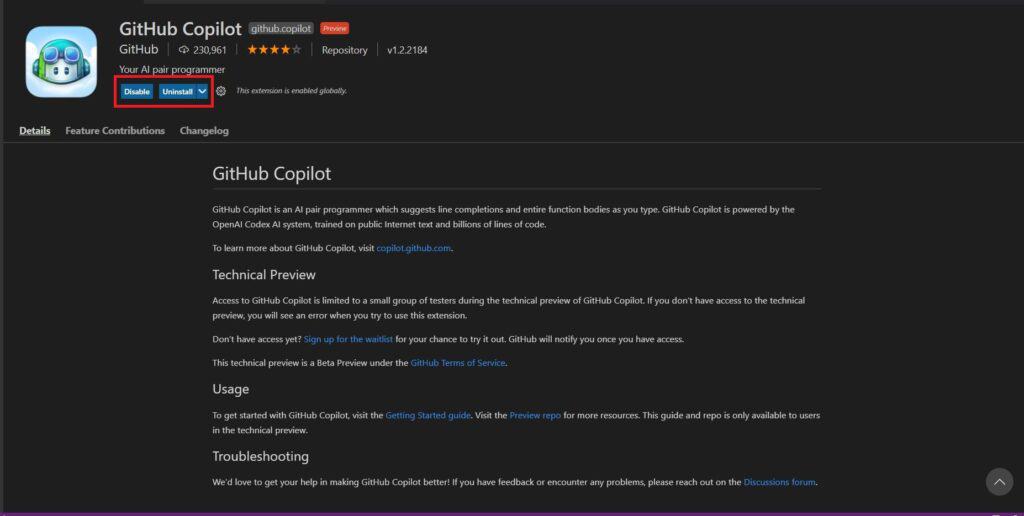
Now GitHub copilot is installed but wait it is not into working state.

Now you can see this kind of pop up in your VS-Code click on Sign in to GitHub.

Once you click on sign in button you will get again popup like this now click on allow button
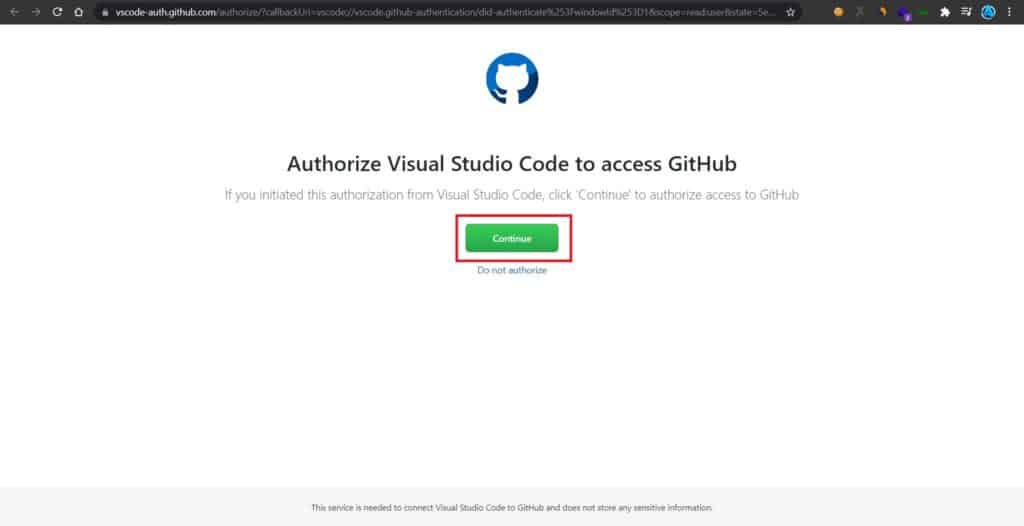
Once you click on allow button you will be redirected to above URL now click on continue
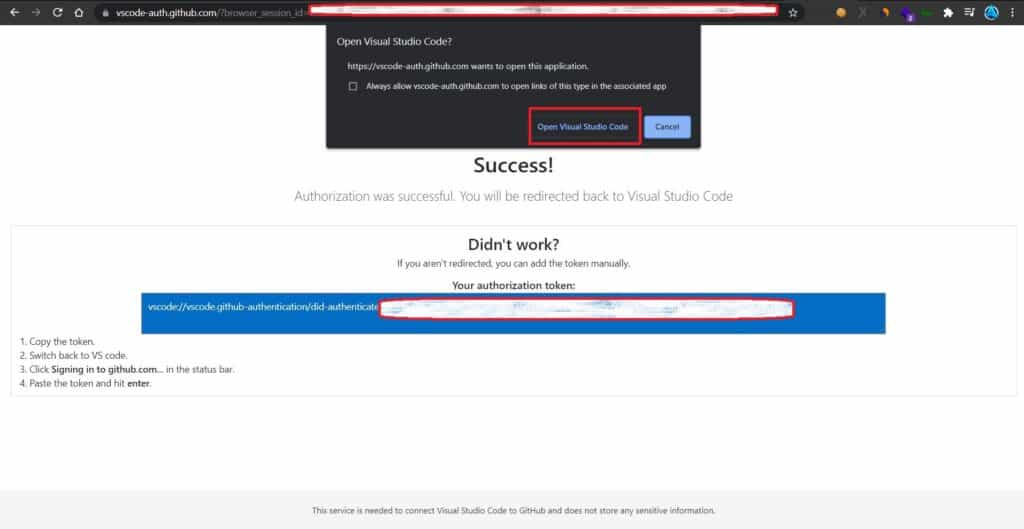
Once you click on continue button you will see this kind of pop up click on open visual studio code

Now after clicking on open vs-code option you will see again popup like this click on open button

Now after you click on allow button you will again get pop up button like this click on join waitlist

Once you click on join waitlist you will be redirected to official website of Copilot click on signup button fill all details.
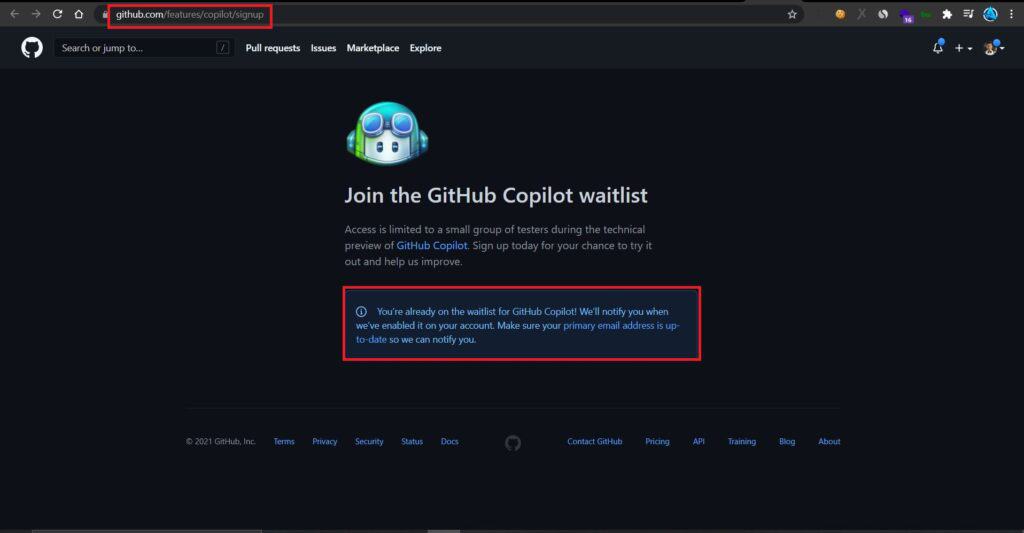
Finally you will get this screen where it is written as you are on waitlist.
As GitHub copilot is on testing phase so it is not available to all we have to wait for few days copilot team will send us mail and from there we can use GitHub copilot.
As we have installed copilot we just have to wait for there approval.
Once GitHub copilot is available to all we will update all other steps.
Leave a Reply